Apple initially introduced its self-repair program in April of 2022, you’re required to provide a serial number just to see what’s on offer. We were able to grab some serial numbers from the Macs we have for repair in the shop, allowing us to continue. While providing a serial number can help ensure a customer doesn’t order the incorrect part, it also allows Apple to track the repair and assign the replacement part to that specific device.
Get A New Trackpad For Replacement
Once we’ve gained access to the parts page, we can see the list of available repairs, which of course differs for each model. For the M1 MacBook Pro, you get everything from the audio and Touch ID boards to the top case and display. All sets of screws and brackets are five dollars each, a replacement headphone jack 12 USD, a fan for 15 USD, speakers for 29 USD, or a USB-C board for just 12 USD.
4That’s not just reasonable, but in most cases, it’s cheaper than what you’ll find on third-party websites. Your more expensive parts include things like Trackpads, displays, logic boards, and Touch ID sensors, which also require running system configuration after repair to pair the component to the device.
System configuration is Apple’s secret key to having a fully functional device after repair, and one no third party can access. That’s because Apple is the only one that can run this program.
So, there isn’t much financial incentive to do the repair yourself through this program if you’re replacing anything substantial like a display or battery. But for other smaller, less commonly replaced parts, they’re significantly cheaper.
Essentials Required To Replace MacBook Pro Trackpad
- Adjustable torque driver (10–34 Ncm) or a regular P5 screwdriver, prepare yourself with the right screwdriver for your MacBook Pro model as Apple has a few different proprietary screws on its devices, google your model and check exactly which screwdrivers are needed.
- ESD-safe tweezers
- Gap offset kit, this goes for 9USD on the Self-Service repair store, but we can DIY it with a few paper pieces.
- Kapton tape Nylon probe (black stick)
- Sticky notes (3 by 3 inches)
- Torx T5 bit
- Torx T5 screwdriver
- ESD nylon spudger.
Extra Tools For Fire Safety
Apples repair manual recommends to always have a few extra tools for a battery safety workspace:
- Clean, dry, untreated sand (8–10 cups)
- Sand container (wide-mouthed, quick pour, nonbreakable plastic container with a flip-top lid)
- Heat-resistant gloves
- Safety glasses with side shields
- ESD-safe cleaning solution
According to Apple, workspaces used to repair Apple devices should meet the following criteria:
- Nonflammable and electrostatic discharge (ESD)-safe work bench
- At least 2 feet away from paper and other combustible materials
- Sand container within reach (2 feet) on one side of the workspace, not above the workspace
- Adequate ventilation
- Within 20 feet of a fireproof enclosure. Don’t store combustible or flammable materials in the enclosure. Ensure that the enclosure remains empty.
Apple recommends using a battery cover for any MacBook repair, this goes for 4.5USD on the self-service repair store, so it might not be a bad investment.
Your caution regarding battery safety is completely justified. In our lab, we strictly adhere to safety protocols for handling batteries, and this is a practice everyone should consider.
Lithium-Ion batteries, common in many devices, are generally safe. However, they can become hazardous if damaged. A simple puncture can potentially turn a battery into a fire hazard. This risk underlines the importance of handling batteries with care.
There’s no such thing as being too careful when it comes to battery safety. It’s crucial to respect these power sources and handle them with the utmost care to prevent accidents. Remember, safety should always be a priority.
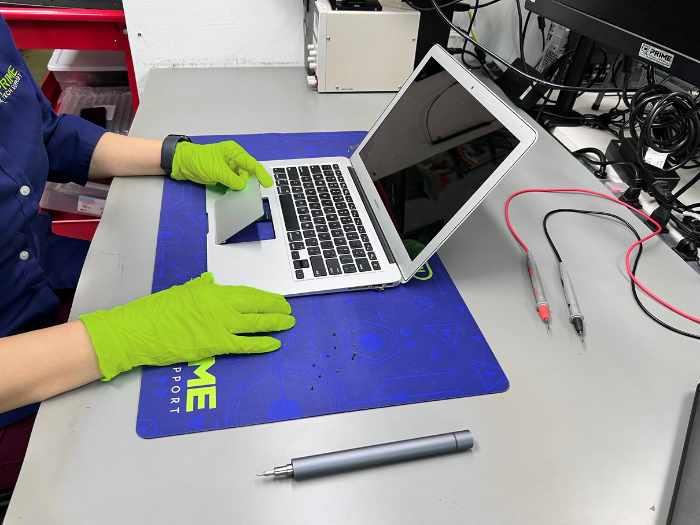
Steps To Replace MacBook Pro Trackpad
These are the essential steps to confidently replace your MacBook Pro’s Trackpad with precision and care:
Power Down
Make sure to fully shut down your MacBook Pro and disconnect it from the wall plug. To do this:
- Go to the top right-hand corner you will see an Apple logo
- Tap of that Apple logo and then you’ll see the shutdown button, press on it.
- A pop up will appear with the message “are you sure you want to shut down your computer now?
- Press on shutdown again and it’s going to automatically shut down.
Take Off The Bottom Case
Turn the MacBook Pro over and remove all the screws on the bottom cover. Next, we can remove the P5 screws holding the back panel in place, with the screws removed, the back panel is still clipped in with clips in the middle of the laptop, which can be tough to get undone.
Depending on your model you might need to press a suction cup into place of the lower case and pull up to open a small gap. Slide the corner of a plastic tool into the gap and begin to open around the nearest corner and then halfway up the side of the MacBook Pro.
This releases the first of the hidden clips securing the bottom cover. Lift the front edge of the lower case and pull firmly to slide the lower case towards you. Pull first one corner, then the other, be careful when removing the back panel as it’s very thin and also razor sharp.
Detach The Battery Connection
The first thing you’re going to do is disconnect the battery to avoid any power running through the device, use only a Nylon Spudger as something hard like a flat head screwdriver will damage the pins.
There’s a cable here with a latch there called Battery Management Unit (BMU) flex cable. It’s very easy to damage this cable, especially the latch. We had someone before who actually came in, broke the latch, and it wasn’t fun to repair.
Conclusion
Successfully replacing the Trackpad on your MacBook Pro (2020-2022) requires patience, precision, and the right tools. This guide has outlined the critical steps for this DIY task, including disconnecting the battery, carefully removing the old Trackpad, and installing the new one with attention to detail.
Key to this process is ensuring proper alignment and securing the Trackpad with the appropriate screws and connectors. It’s also crucial to adhere to safety precautions, especially when handling the MacBook’s battery.
Although this task might seem daunting, especially for beginners, following these steps can lead to a rewarding and cost-effective solution for a malfunctioning Trackpad. Remember, if at any point the process feels overwhelming, seeking professional help is always a wise choice.
With patience and careful attention to detail, you can restore the tactile responsiveness and functionality of your MacBook Pro’s Trackpad.